My Shop Asia — Content Editor Guide
Welcome to the editor manual for My Shop Asia. This guide walks you through every daily task: uploading images, creating categories, adding and updating products, configuring discounts and shipping zones, and processing customer orders.
1. Introduction: Access & Logging In
Getting StartedThis is the operations manual for the My Shop Asia Backend. You manage the shop through the web-based admin panel accessible from any browser on your computer.
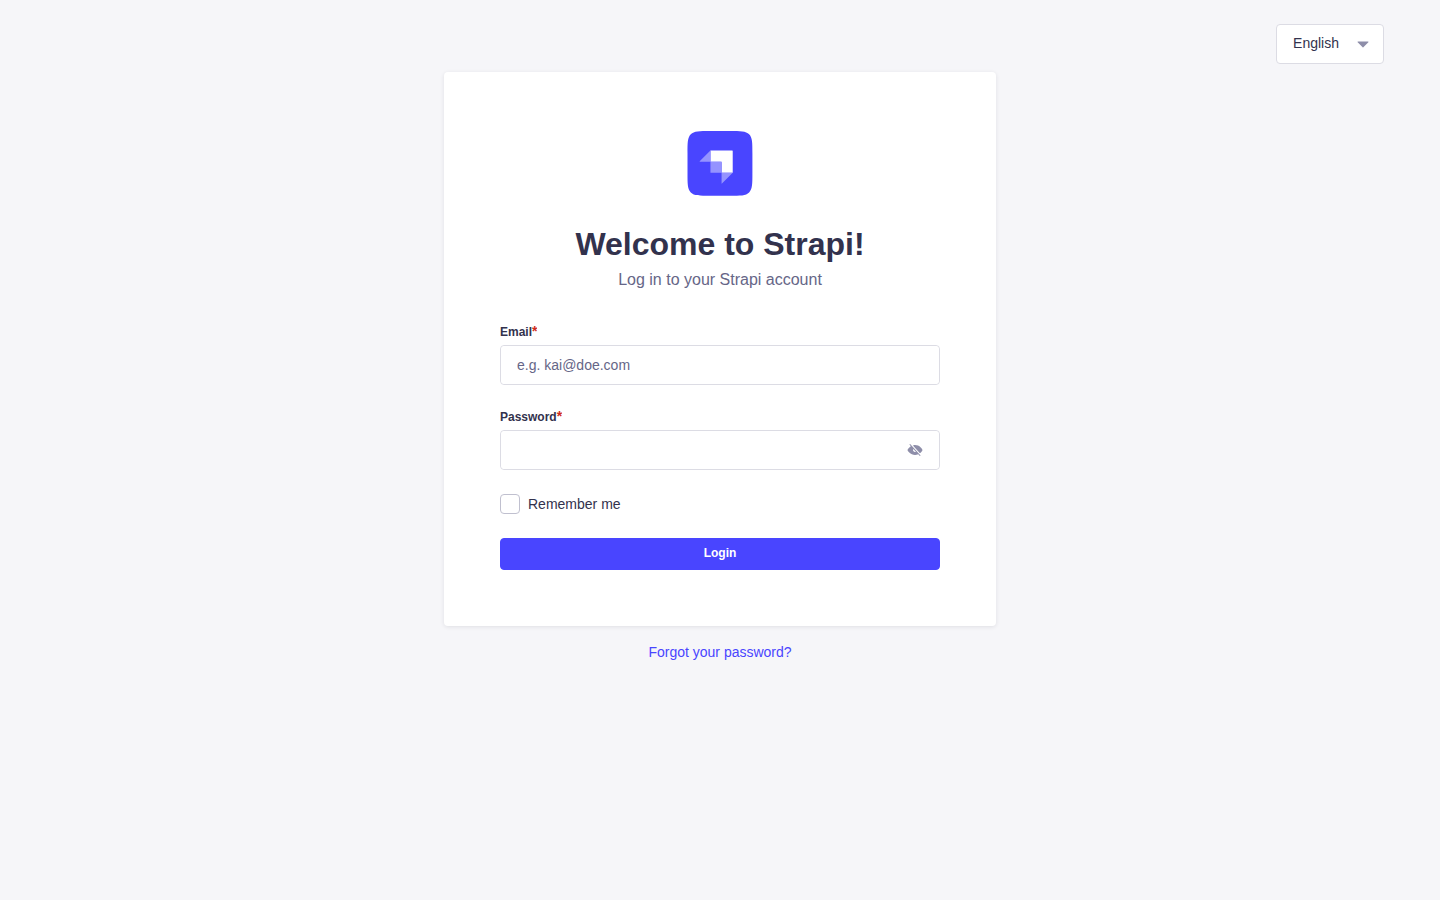
How to Log In
Navigate to https://strapi.myshopasia.com/admin in your web browser.
In the Email field, enter your assigned staff email address (e.g. agent@user.com). In the Password field, enter your password.
Click the blue Login button. You will be taken directly to the main administration dashboard.
2. Admin Panel Tour & Sections
NavigationOnce logged in, the primary navigation sidebar on the left gives you access to the shop's management areas.
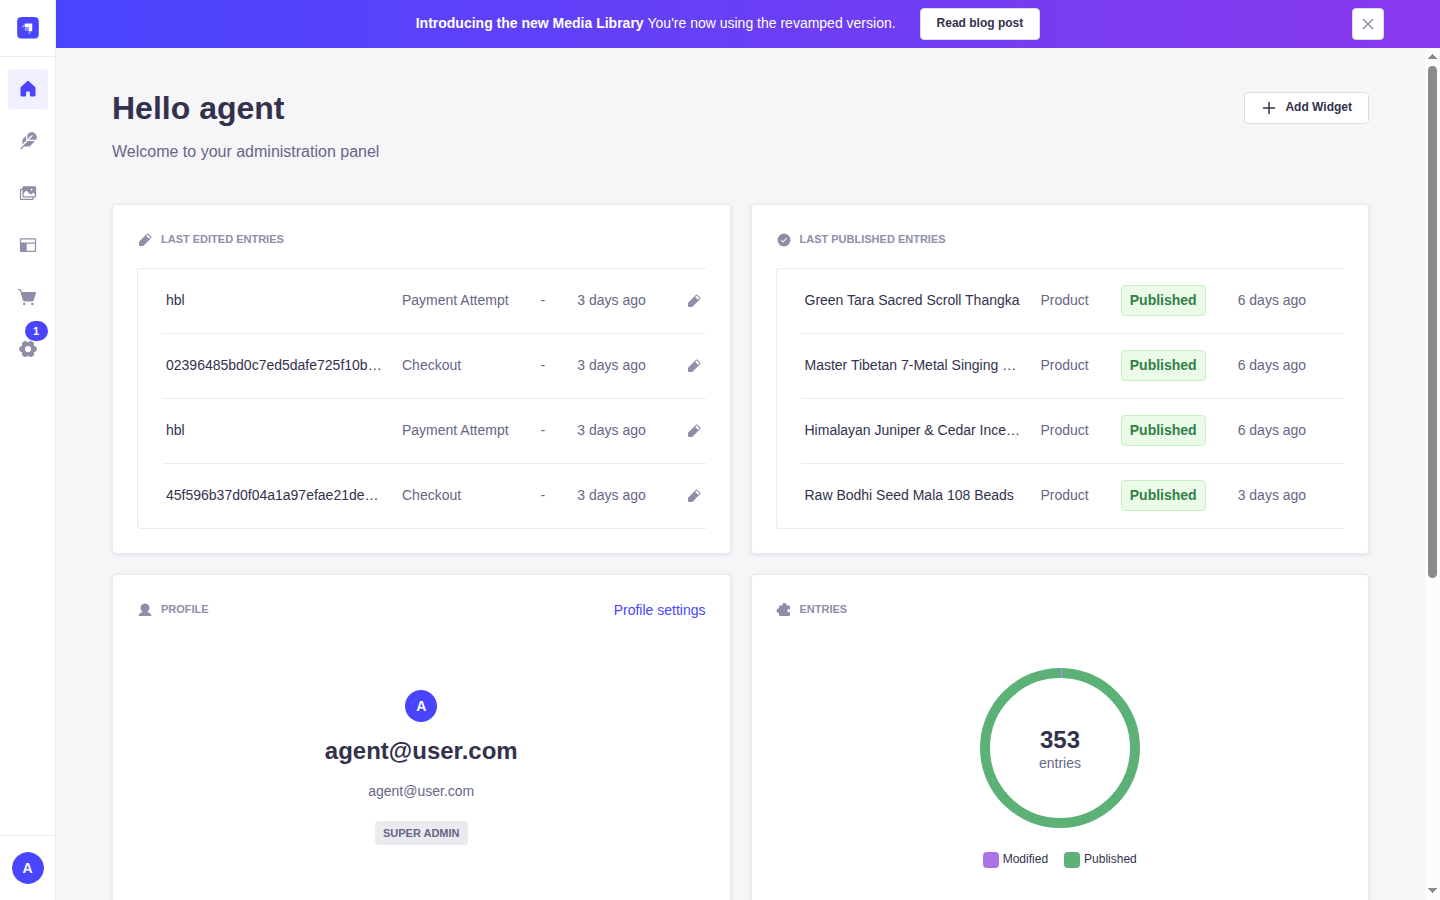
What Each Sidebar Section Is For
| Section | Purpose | How You Use It |
|---|---|---|
| Content Manager | The core editorial workplace for all store data: products, categories, discounts, shipping zones, and orders. | Primary Workspace This is where you will spend 90% of your time. |
| Media Library | The centralized photo repository for all product photos, banners, and icons. | Primary Workspace Used whenever you upload, organize, or replace images. |
| Content-Type Builder | A developer tool used when building data models. It is automatically disabled in production. | Developer Only You do not need to touch this section. |
| Marketplace | Plugin and extensions marketplace. | Informational Handled by system developers. |
| Settings | Administrative settings: Managing staff user accounts, team roles, and profile settings. | Administrative Used when inviting new staff or updating your account password. |
3. Content Manager: Types Overview
Data ArchitectureClicking Content Manager opens the list of content collections. Below is a quick introduction to each collection type and single type so you understand what each one represents.
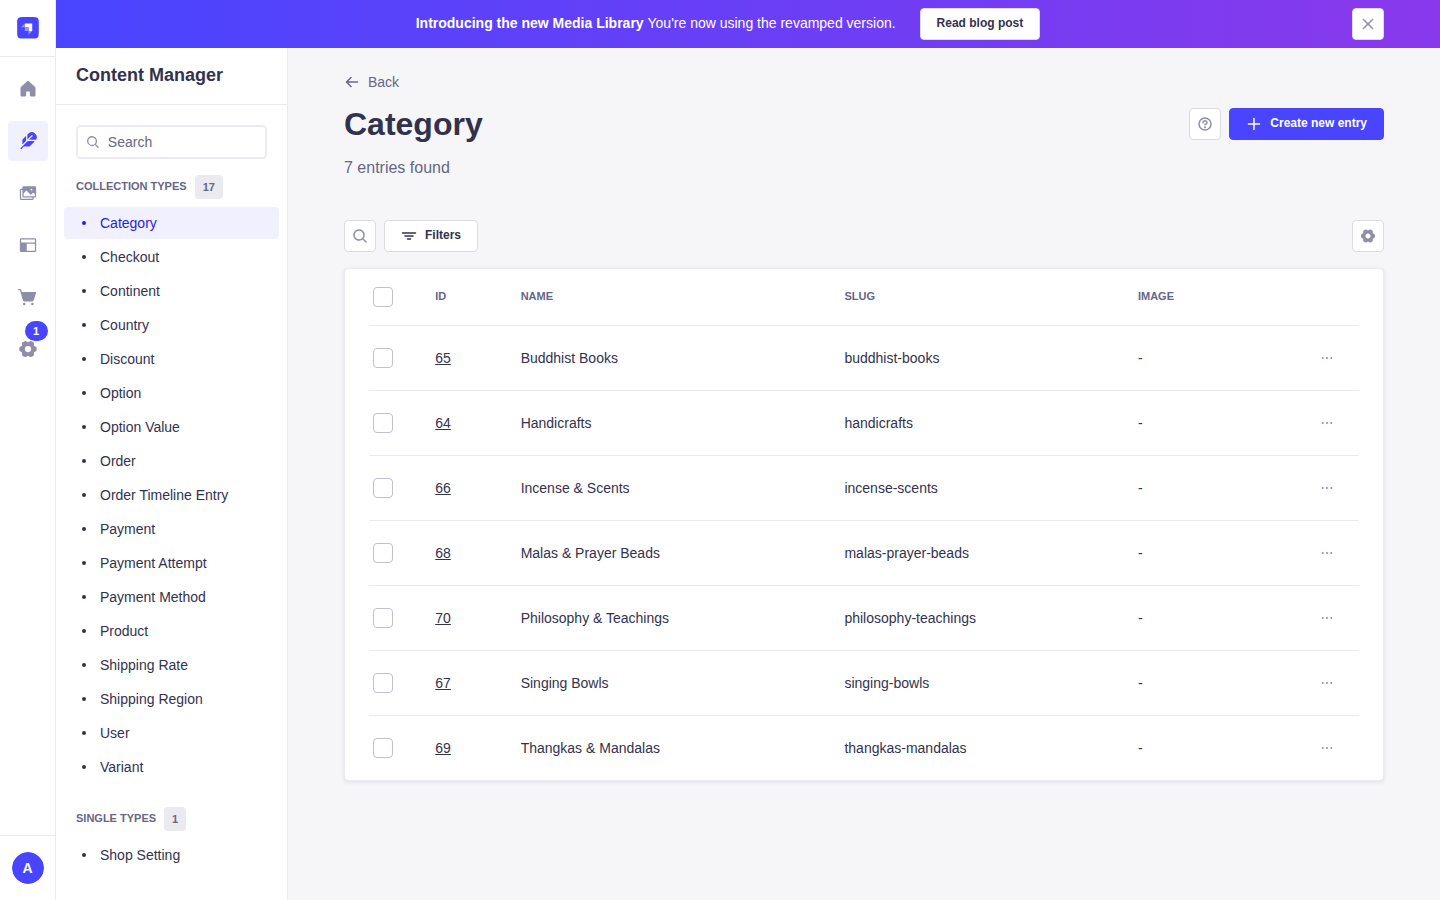
Editorial Collection Types (What You Manage)
| Type | Description | Editorial Action |
|---|---|---|
Product |
The items sold by the shop (thangkas, singing bowls, malas, books). Contains title, slug, price, stock, weight, photos, and categories. | Add new products, update prices, manage stock, publish live. |
Category |
The category tree (e.g. Handicrafts with Singing Bowls under it). | Create parent and child categories to structure the shop navigation. |
Option & Option Value |
Shop-wide variant choices (e.g. Option: Size; Option Values: 60×45 cm, 80×60 cm). | Set up selectable options before attaching them to products. |
Variant |
Purchasable product combinations with their own SKU, stock, weight, and price. | Create specific variant entries for products that offer options. |
Discount |
Reusable sales and promotional discounts (percentage off or fixed dollar amount off). | Create discounts and assign them to one or more products. |
Shipping Region |
Geographical regions grouping countries that share the same shipping rates and payment methods. | Add continents and countries, set payment options. |
Shipping Rate |
Reusable shipping price tables based on parcel weight bands. | Configure weight tiers, prices, and free shipping thresholds. |
Order |
Customer purchases placed via Pay Now (Card) or Pay on Delivery. | Update fulfilment statuses (Confirmed, Shipped, Delivered) and tracking numbers. |
Shop Setting (Single Type) |
Store-wide numbers: Pay on Delivery limit, checkout lifetime, notification email. | Adjust store limits and notification settings. |
Checkout, Payment, Payment Attempt, Order Timeline Entry, Continent, and Country in the list. These are automatically created and maintained by the backend during customer checkout and bank payment processing. You do not need to create or edit them manually.
4. Media Library: Uploading & Managing Photos
AssetsThe Media Library stores every product photo, category banner, and shop illustration. It automatically generates optimized responsive image formats upon upload.
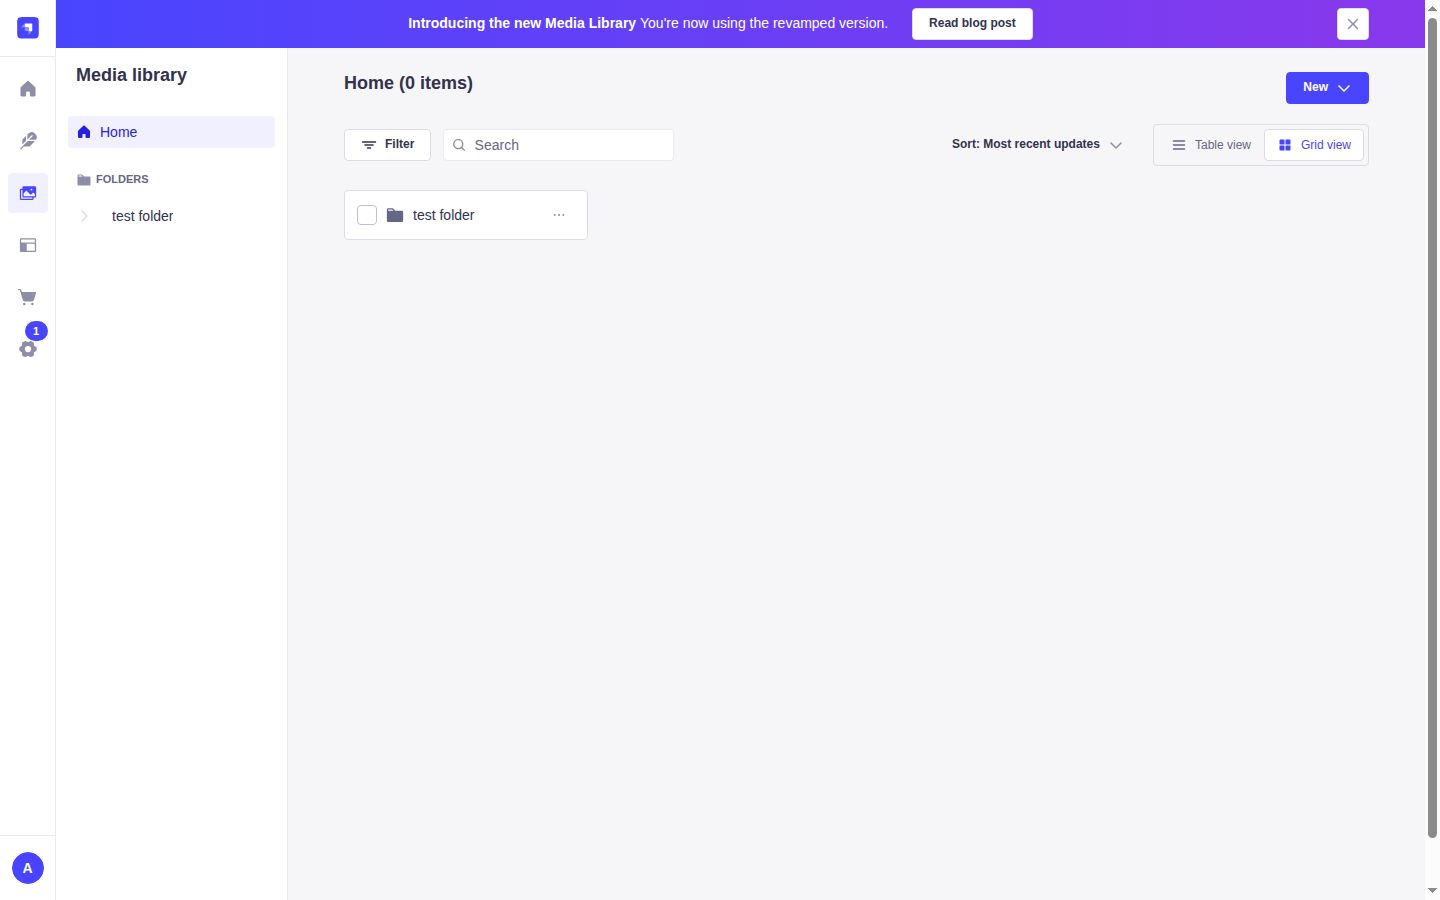
Step-by-Step: Managing Images
Click the + Add new folder button in the top-right corner. Create folders like Products/, Categories/, and Brand/ to keep assets organized.
Open the appropriate folder and click + Add new assets. Drag and drop your image files or click Browse files. Recommended format: high-resolution WebP or JPG, 1200×1200 px or 1200×1600 px, under 500 KB per photo.
Click on any uploaded photo card to open its detail modal. Fill in the Alternative text field (e.g. "Hand-hammered 7-metal Tibetan singing bowl with wooden striker"). This helps both visually impaired shoppers and search engine SEO.
If you want to update an existing photo with an improved shot, click the image card, click Replace asset, and upload the new version. This seamlessly updates the photo across every connected Product without needing to re-link relations.
5. Creating a New Category
Catalog TaxonomyCategories organize products into an easy-to-browse tree. You can create top-level root categories (e.g. Handicrafts) and nested subcategories (e.g. Singing Bowls under Handicrafts).
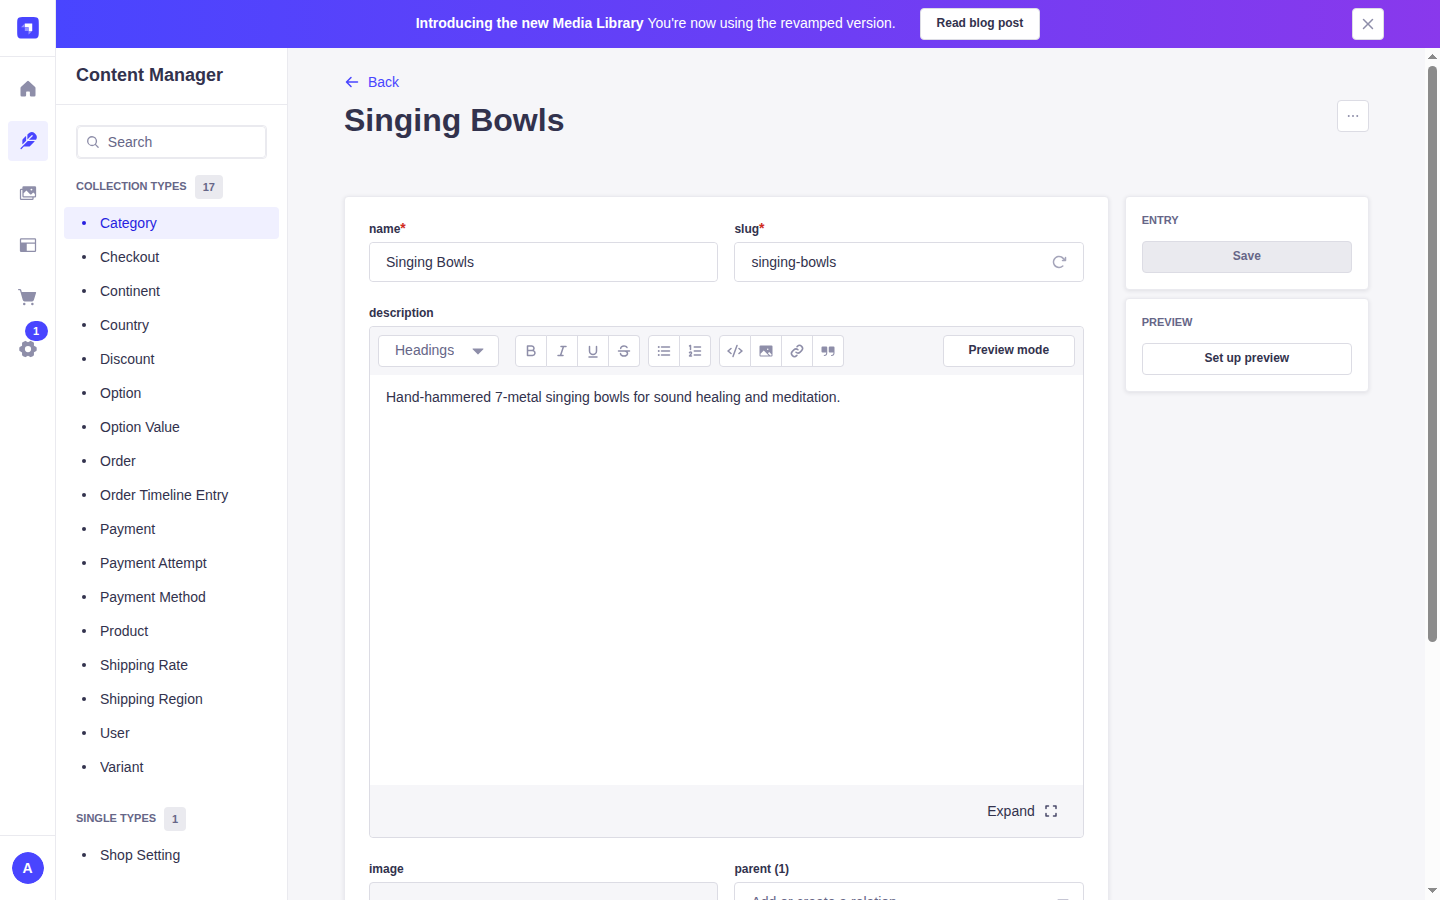
Step-by-Step: Adding a Category
In the left sidebar, click Content Manager -> Category, then click the blue + Create new entry button in the top-right corner.
Type the category name into the name field (e.g. "Singing Bowls"). The slug field auto-generates the URL path (singing-bowls). You can click Regenerate at any time.
Write a short description in the rich-text editor explaining what this category includes. In the image area, click to attach a featured cover photo from the Media Library.
• Root Category: If creating a top-level department (e.g. Handicrafts), leave the parent field empty.
• Subcategory: If creating a child subcategory (e.g. Singing Bowls), click the parent dropdown and select the root category (Handicrafts).
Click the Save button in the top-right corner. The category is immediately saved and available for products.
6. Adding a New Product
Catalog ManagementProducts represent the items customers purchase. Below is the complete procedure for creating a new product with photos, prices, weight, categories, and publishing it live.
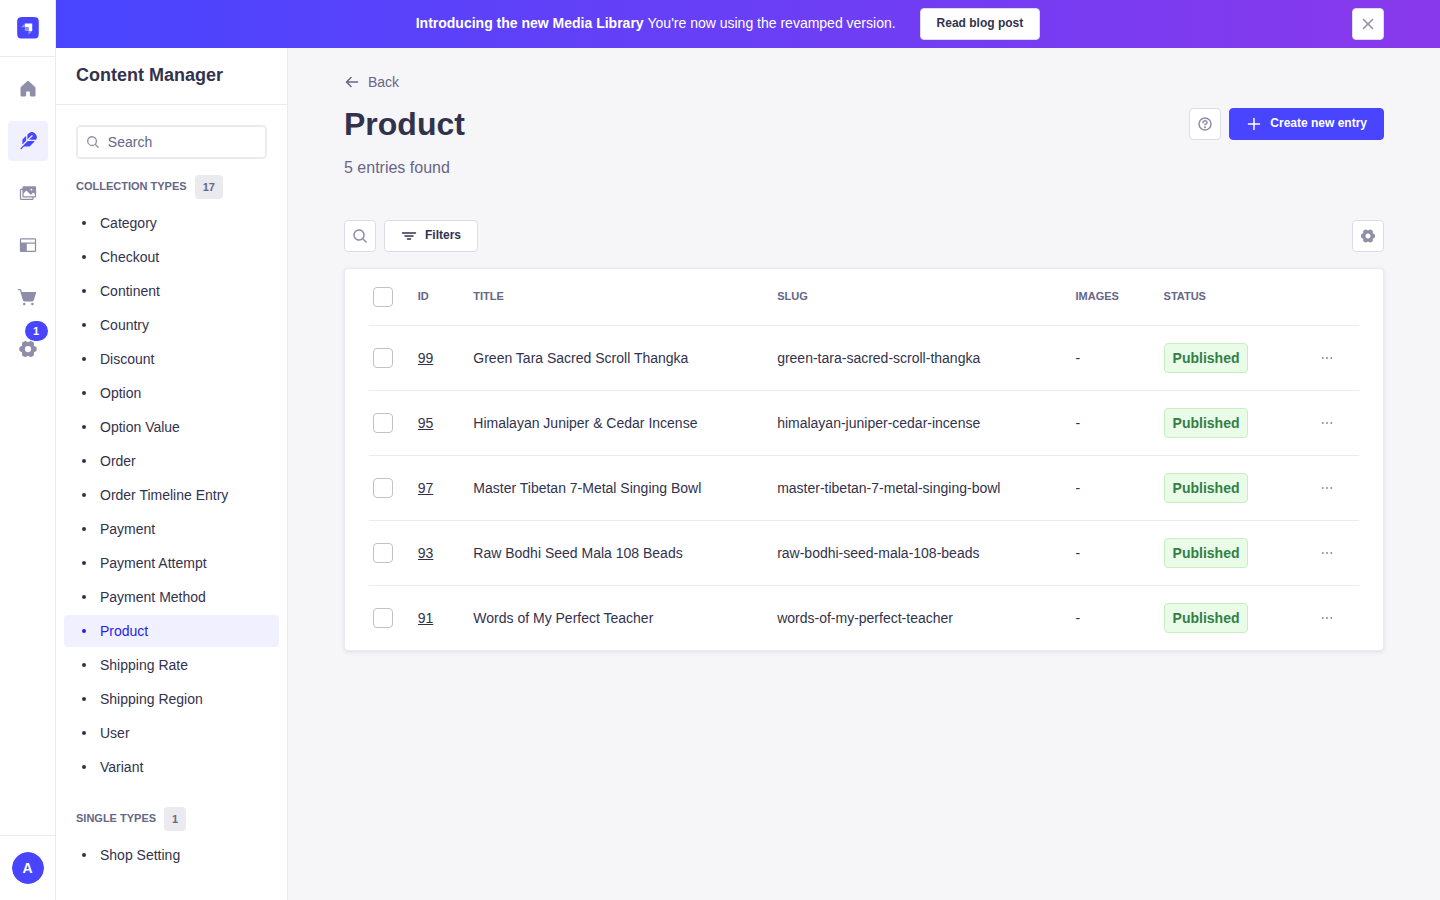
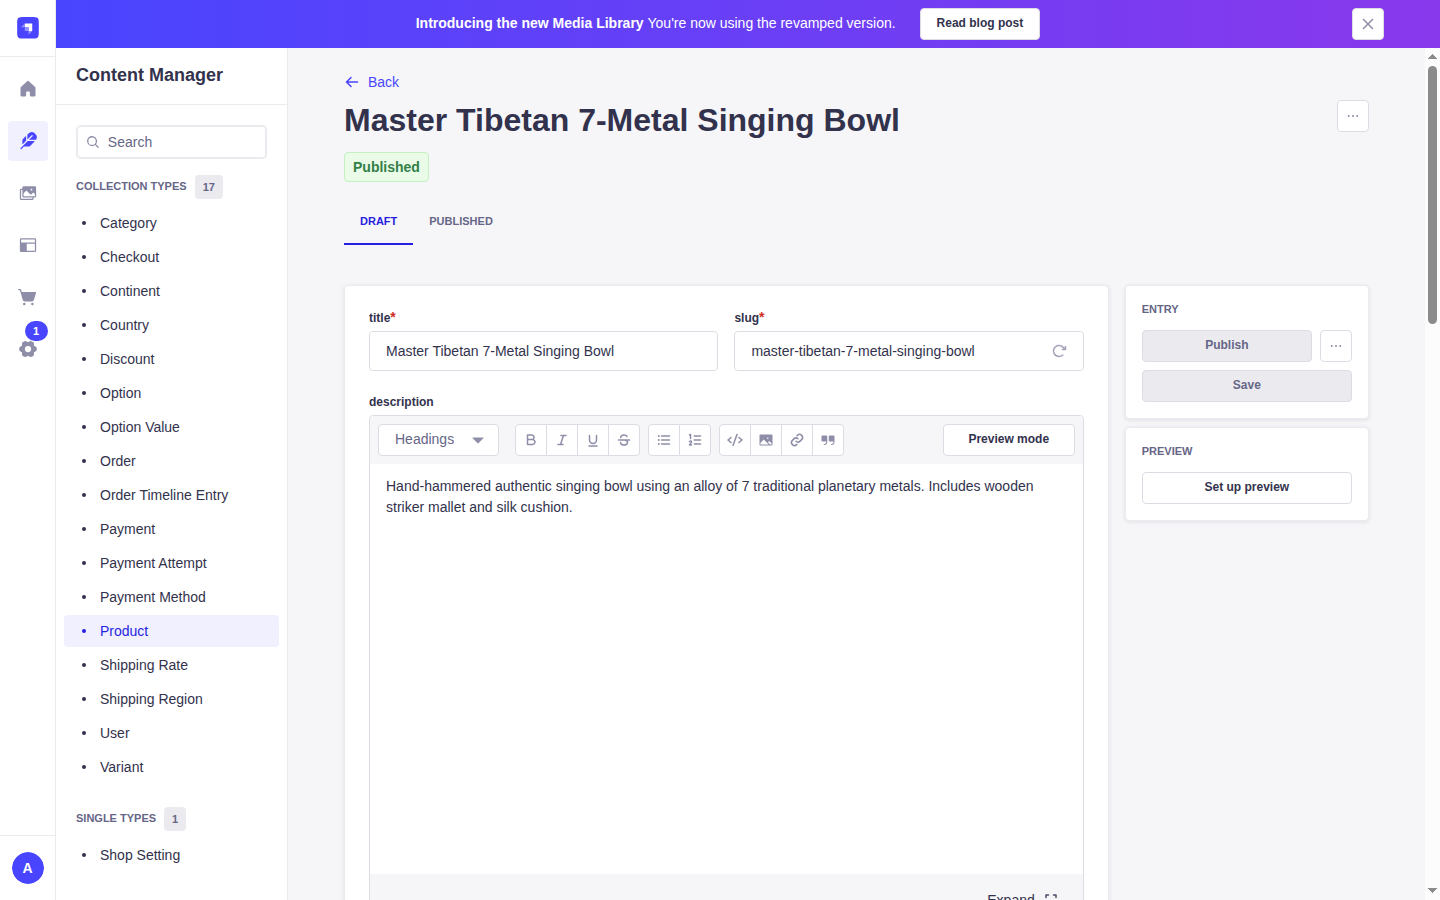
Step-by-Step: Adding and Publishing a Product
In the sidebar, click Content Manager -> Product. Click the blue + Create new entry button in the top-right corner.
Type the product name into the title field (e.g. "Master Tibetan 7-Metal Singing Bowl"). The slug field auto-generates the URL path. You can click Regenerate if you update the title.
Use the rich-text editor to write details about the item's material, traditional hand-hammering process, size, and spiritual significance. You can format with bold text, bullet points, and headers.
Click the dashed box labeled "Click to add an asset or drag and drop one in this area". Select one or more photos from the Media Library. The first photo will be used as the primary storefront thumbnail. Drag photos inside the box to reorder.
• price: If the product does NOT have variants, enter the unit price in USD cents (e.g. $85.00 is entered as 8500). If the product uses Variants, price is configured on each Variant instead.
• stock: Number of items physically available in inventory.
• weight: Package weight in kilograms (e.g. 0.85). This is essential for calculating shipping rates accurately. Items without a weight count as 0 kg.
Click the categories relation dropdown. Search and select all relevant categories (e.g., Handicrafts and Singing Bowls). A product can belong to multiple categories.
• Click Save on the right panel to save your work as a private draft without showing it on the website.
• Click Publish on the top-right panel to make the product immediately live and visible to customers on the online store.
7. Updating & Editing Existing Products
MaintenanceWhenever prices change, inventory arrives, or descriptions need refinement, updating products is fast and straightforward.
Step-by-Step: Updating a Product
In Content Manager -> Product, use the search box or filter bar at the top to find the product by title or SKU. Click anywhere on the row to open the editor.
Update the desired fields: adjust stock counts, update pricing, add new photos to the gallery, or tweak descriptions.
• If you click Save, changes remain stored in the DRAFT tab while the live website continues showing the previous published version.
• Click Publish to immediately push all your new changes to the live storefront.
8. Deleting & Unpublishing Products
Catalog CleanupWhen an item is discontinued, sold out for a season, or added by mistake, you can either unpublish it or delete it completely.
Option A: Unpublish (Recommended)
Keeps your product data safely stored in the backend, but hides it from customers on the store website. Recommended when an item is temporarily out of stock or seasonal.
1. Open the product in Content Manager -> Product.
2. In the right-hand action panel, click the ... (More document actions) button.
3. Click Unpublish.
4. The product status immediately switches to draft.
Option B: Delete (Permanent)
Permanently removes the product from the store. Use only for test items or products entered by mistake.
1. In the product list, click the three dots on the far-right of the row, or open the product.
2. Click Delete entry.
3. Confirm the deletion prompt.
4. The record is permanently removed.
9. Options & Product Variants
Attributes & SKUsWhen an item comes in choices like different sizes (e.g. 60×45 cm vs 80×60 cm) or colors, the shop uses shop-wide Options and Option Values linked to purchasable Variants.
Step-by-Step: Creating Product Variants
In Content Manager -> Option, make sure the Option exists (e.g. "Thangka Size"). If not, click + Create new entry and enter the name.
In Content Manager -> Option Value, add each choice (e.g. "60×45 cm" and "80×60 cm"), select the matching Option (Thangka Size), and give it a sort_order (e.g. 1, 2).
Open the parent Product in Content Manager -> Product, scroll down to the options field, select Thangka Size, and click Save.
In Content Manager -> Variant, click + Create new entry for each purchasable combination:
• product: Link to the parent Product.
• selected_options: Select the matching Option Value (e.g. 60×45 cm).
• price: Price in USD cents for this variant (e.g. 12000 for $120.00).
• stock: Available inventory count for this specific version.
• sku: Unique SKU code (e.g. TK-GT-60-RED).
• weight: Package weight in kg for this size.
10. Creating & Applying Discounts
PromotionsDiscounts provide reusable price reductions that apply cleanly across products and their variants. A product has at most one active Discount at a time.
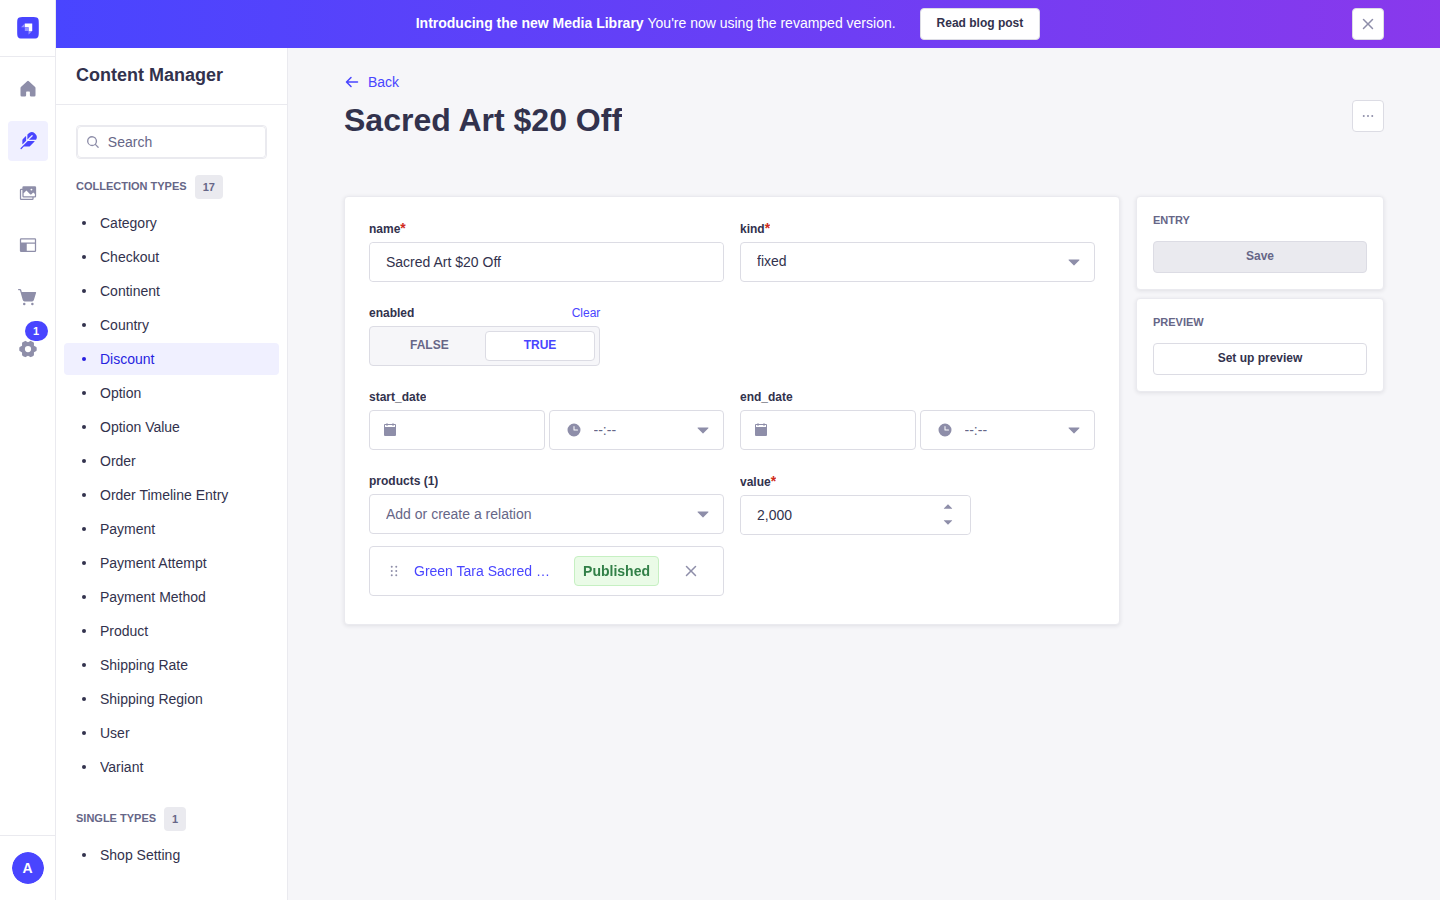
Step-by-Step: Creating a Discount
In the sidebar, click Content Manager -> Discount, then click + Create new entry.
Type a clear promotion name (e.g. "Sacred Art $20 Off" or "Autumn Special 15% Off"). In the kind dropdown, choose:
• percent: For a percentage reduction off each unit.
• fixed: For a fixed dollar reduction off each unit.
• For percent: Enter the percentage number (e.g. 15 for 15% off).
• For fixed: Enter the dollar amount in cents (e.g. 2000 for $20.00 off).
Ensure enabled is switched to True. You can optionally set start_date and end_date for time-limited sales.
In the products field, select the products that should receive this sale price. Click Save. The sale price automatically applies to those items on the storefront.
11. Shipping Regions & Geographic Zones
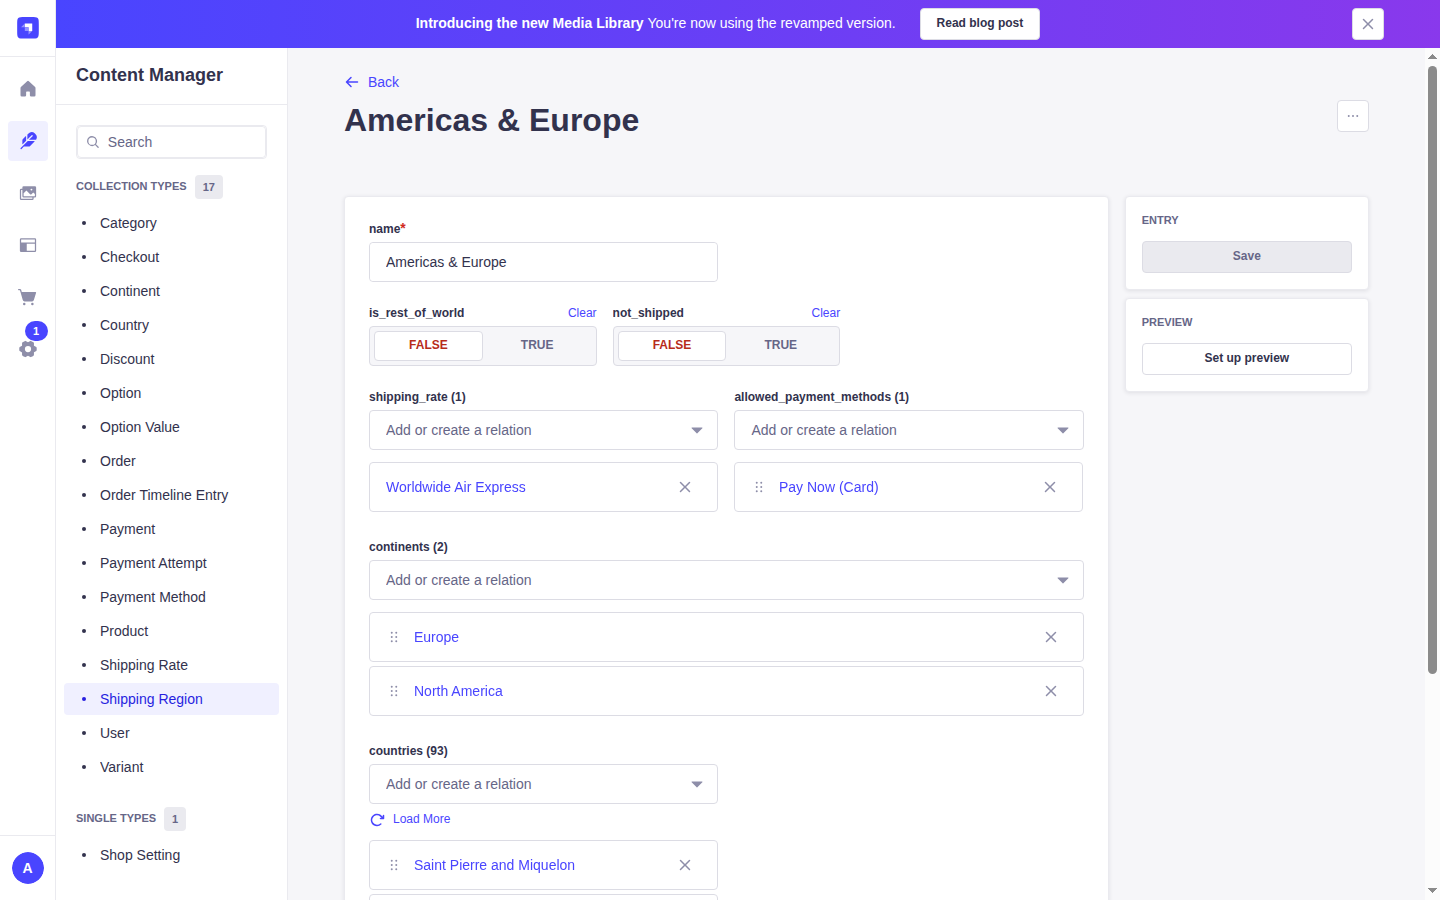
Fulfillment GeographyA Shipping Region groups destination countries that share the same shipping rate and payment methods. The shop uses relational multi-select pickers with automatic continental expansion.
Step-by-Step: Adding a Shipping Region
In the sidebar, click Content Manager -> Shipping Region, then click + Create new entry.
Enter a clear name for the shipping zone (e.g. "Americas & Europe" or "South Asia").
In the continents field, select the desired continents (e.g. Europe and North America). When you save, the backend automatically pulls and adds all constituent countries into the countries relation!
If there are specific destinations within a continent you do not ship to, simply click the × on those specific country pills to remove them. The continent relation remains active as long as at least one country remains.
• In shipping_rate, select the reusable rate table (e.g. Worldwide Air Express).
• In allowed_payment_methods, select Pay Now (Card) and/or Pay on Delivery.
Click Save in the top-right corner to store the region.
12. Shipping Rates & Weight Bands
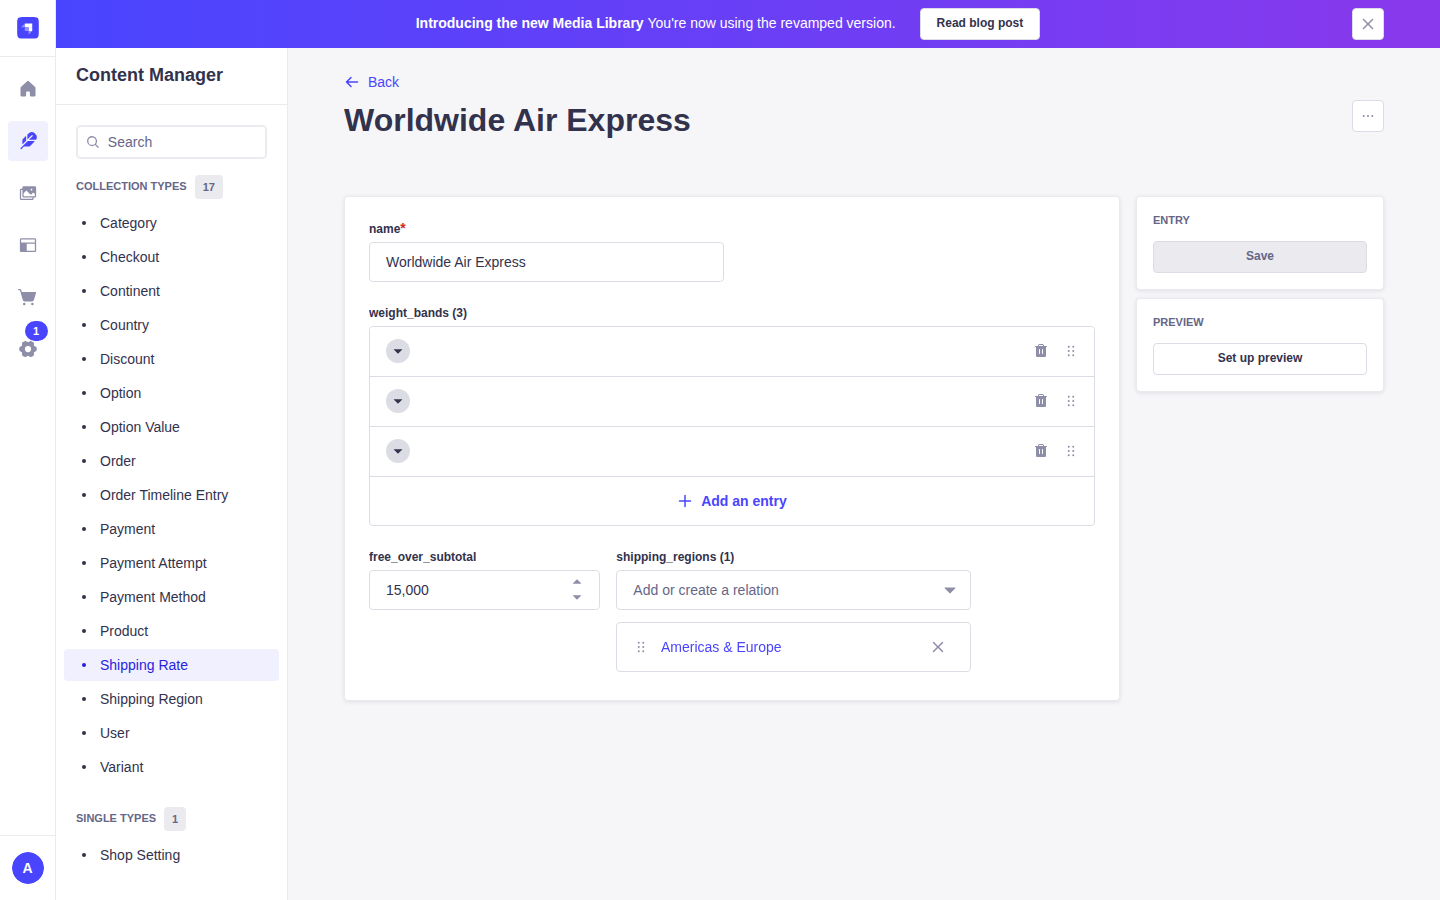
Price TablesA Shipping Rate is a reusable price table made of Weight Bands. When a shopper places an order, the system calculates the total weight of their cart items and uses the first weight band their weight fits into.
Step-by-Step: Configuring Shipping Rates and Weight Bands
In Content Manager, click Shipping Rate, then click + Create new entry.
Enter a descriptive title for this shipping option (e.g. "Worldwide Air Express" or "Nepal Domestic Delivery").
Scroll to the weight_bands component and click + Add an entry for each tier:
• up_to: Upper weight limit in kg (e.g. 0.5 for up to 500g). Leave empty on the last band for an open-ended tier.
• price: Base price in USD cents (e.g. 2500 for $25.00).
• price_per_kg: Optional additional fee per kg for heavier items (e.g. 1000 for $10.00/kg).
In free_over_subtotal, enter the cart subtotal in cents at which shipping becomes free (e.g. 15000 for free shipping over $150.00). Leave empty or enter 0 if free shipping is not offered.
Click Save in the top-right corner to save the shipping rate table.
13. Processing Customer Orders & Fulfilment
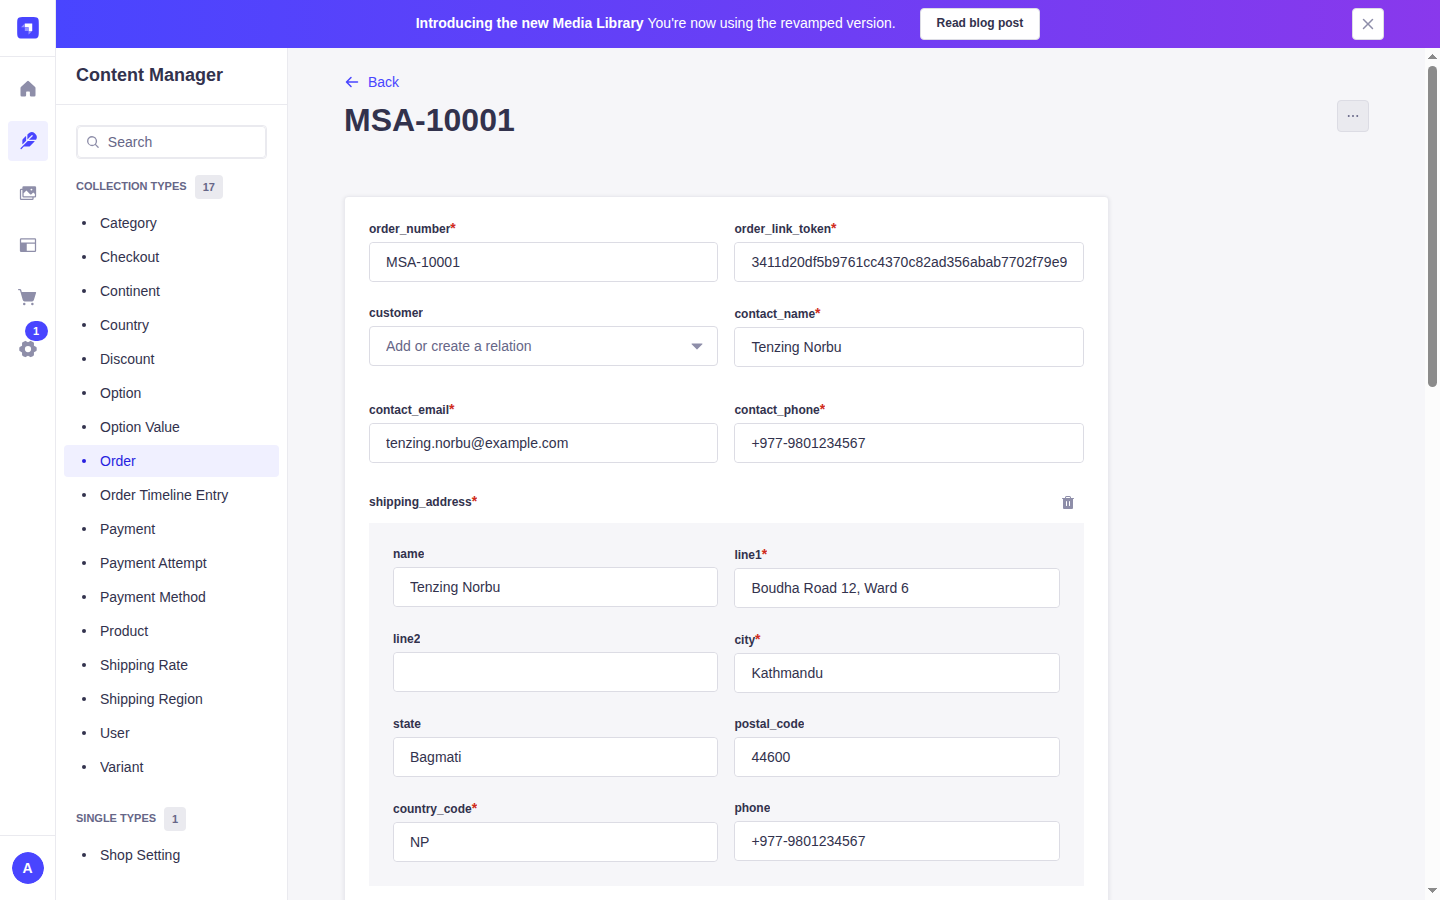
Order OperationsAn Order represents a customer's committed purchase. Orders are created automatically when paid online via Pay Now (Card) or placed with Pay on Delivery. Staff update fulfilment and tracking as parcels are packaged and dispatched.
Step-by-Step: Processing an Order
Open Content Manager -> Order and search or filter by the public order_number (e.g. MSA-10001). Click the row to open the order details.
Verify the customer contact details, delivery address, and ordered line items. Prepare the package from warehouse inventory and weigh the parcel.
Once the package is handed to the courier, scroll to fulfilment_status and change the status from confirmed to shipped.
Enter the courier name in carrier (e.g. "DHL Express" or "Nepal Post") and the tracking code in tracking_number. Shoppers will automatically see this tracking number on their permanent Order Link page.
Click Save in the top-right corner to save the order updates.
True, check the needs_attention_reason. The most frequent case: an online Pay Now card payment was authorized for an item that sold out while the customer was paying. In this case, Staff review the order and initiate a customer refund.
14. Shop Settings
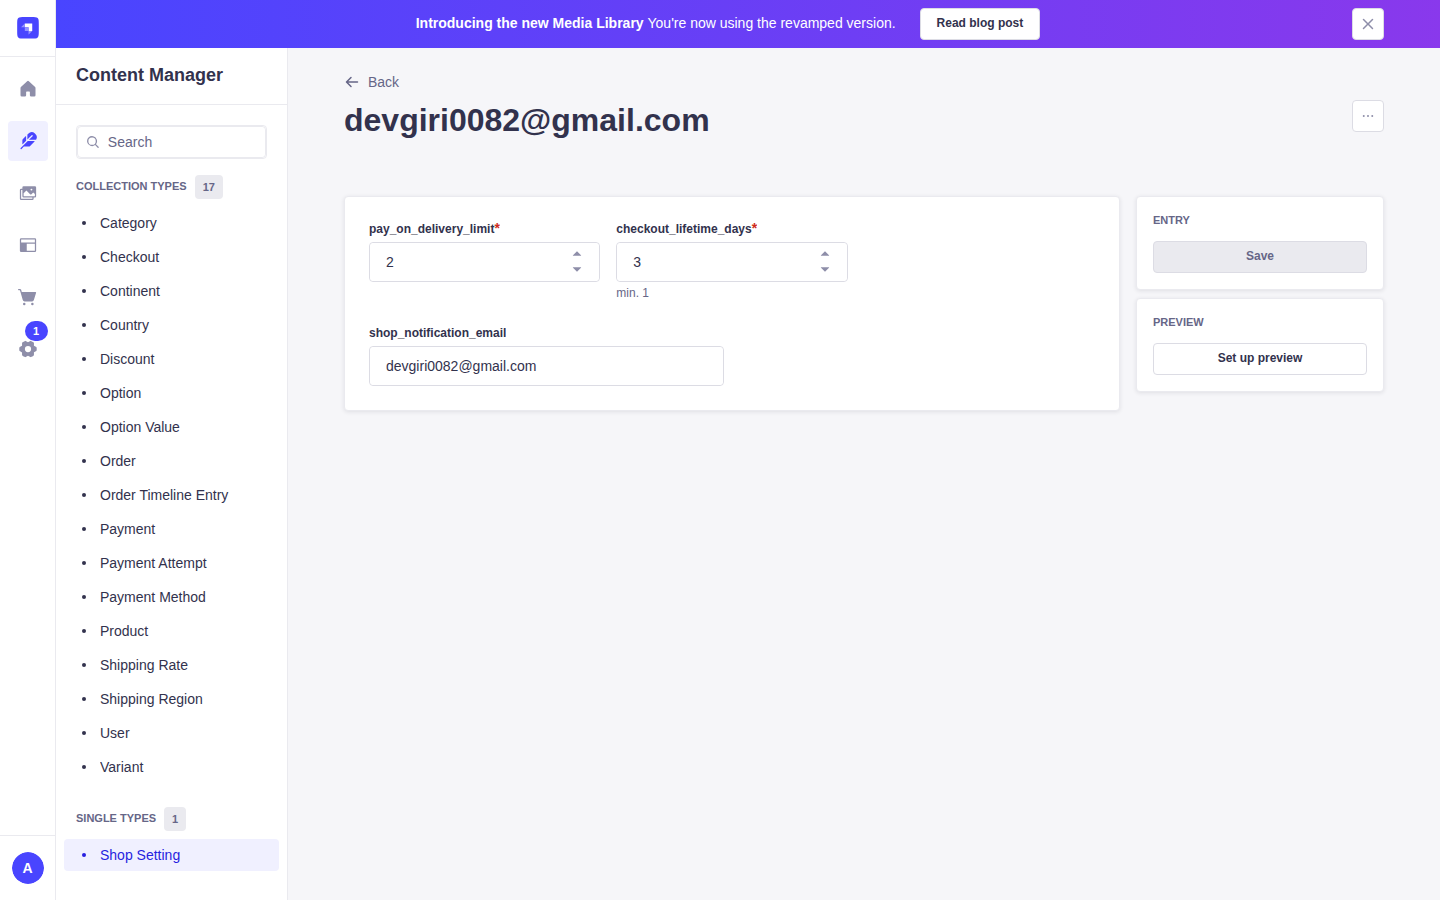
Single TypeLocated under Single Types in Content Manager, Shop Setting contains store-wide numerical rules and administrative email addresses that Staff can configure without developer intervention.
Configurable Shop Settings
| Setting Field | Default | Description |
|---|---|---|
pay_on_delivery_limit |
2 |
Maximum active, unpaid Pay on Delivery orders one shopper may have simultaneously (verified by email & phone). Prevents spam orders. |
checkout_lifetime_days |
3 |
Number of days a pending Pay Now checkout link remains valid before automatically expiring if unpaid. |
shop_notification_email |
shop@myshop.asia |
The store notification mailbox that receives transactional notifications when new orders are placed. |